
Log into Google Docs: change Margins in Google Docs

How to Change Margins in Google Docs
Log into Google Docs: For upon |The gap in a document, between the text and the edge of a document is called a margin. For visual reasons and a better experience for a reader, it is recommended to make some space between and not to spread the text to the edge. In both Word and Google Docs, margin space is set up by default. In case you need to make margins smaller or bigger, here is a quick guide on how to change margins in Google Docs.
What are the default margins in Google Docs?
2.54 cm (1 inch) is a default margin in Google Docs and Word as well. It is referred to all margins- top, bottom, left, and right. However, you can easily change margins in Google docs in case you have special requirements. You can change margins only at the top or only at the left side, it’s up to you.
How to change header margins in Google Docs?
Open Google Docs and click on the File menu. Then click on the Page Setup option. Upon clicking on it, the Page Setup window will pop up as shown in the image below.
In the Top section write the size of the margins in inches. Click OK if you want to apply that rule only to the existing document. If you want to make those changes default, click the Set as default button.
How to change top and bottom margins in Google Docs?
If the Google docs bottom margin is too big, you can type different margin values in the Bottom section. So, the initial steps are the same, click on the Page Setup from the File menu, and on the right side of the pop-up window, you will see the field where you can enter change bottom margin values.
In the same manner, you can change left and right margins as well. If you decide to choose Set as the default option, and after some time you want to change it, you can repeat these steps.
Related Posts
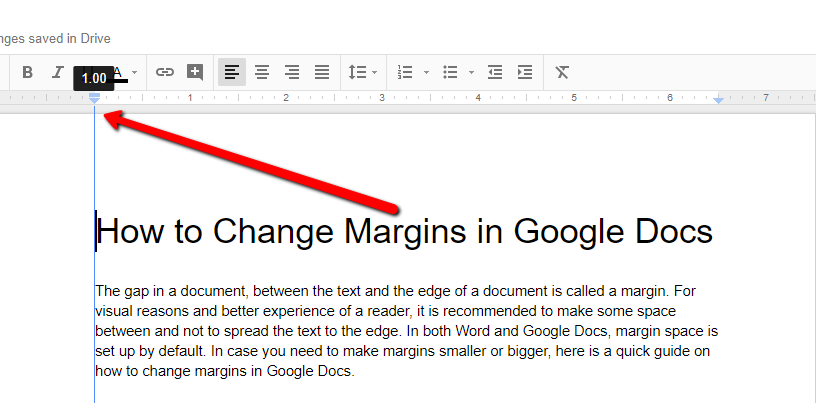
How to change margins in Google Docs with a ruler?
Between the white space (where you write) and the Google docs toolbar, you can see the ruler. Click with the left side of the mouse on the grey area of the ruler and drag it. You need to hold the mouse click so the ruler can move. For example, if you want to change the left margin, drag the ruler from the top left side to the right. The ruler will show you the margin size in inches. Make sure you move indents- those blue small objects.
In the same way, you can change the margins on the right side. For example, if you want to make the right margins wider, move the ruler and the right indent from right to left. The ruler will show the numbers so you can easily set up the wanted size. If you want to make the right margin smaller, drag the ruler to the right.
As you can see, the ruler can be dragged only on the left and right. If you want to change top or bottom margins, you need to open Page Setup options.
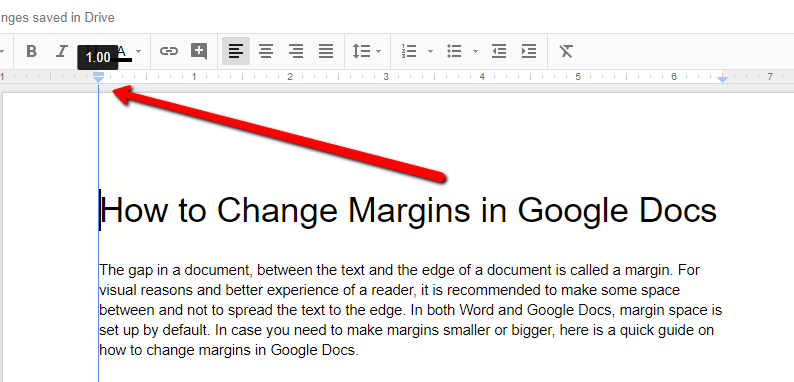
Change margins in Google Docs, but only for one paragraph
In cases when you need to change the margins of specific parts of the text, like one paragraph, you need to follow a bit of different guidelines. First, click at the beginning of that paragraph if you want to have different margins. Then drag only the blue object, by holding the left mouse click. Make sure that the grey ruler hasn’t been moved. Here is an example below, of how it should look like.

There you are! You can repeat the process for other paragraphs or parts of the text.
Share with us in the comments, what margin size you prefer, and if there are any “rules” of margin sizes of different types of documents.
Comments are closed.